【Macでゲームを作ろう】ブロック崩しを作っていく第3回 [AppleScript辞書はつくれるか?]
今回は、ブロックを崩していくボールを動かします。
今回新しく紹介するのは
class "NSTimer"
です。
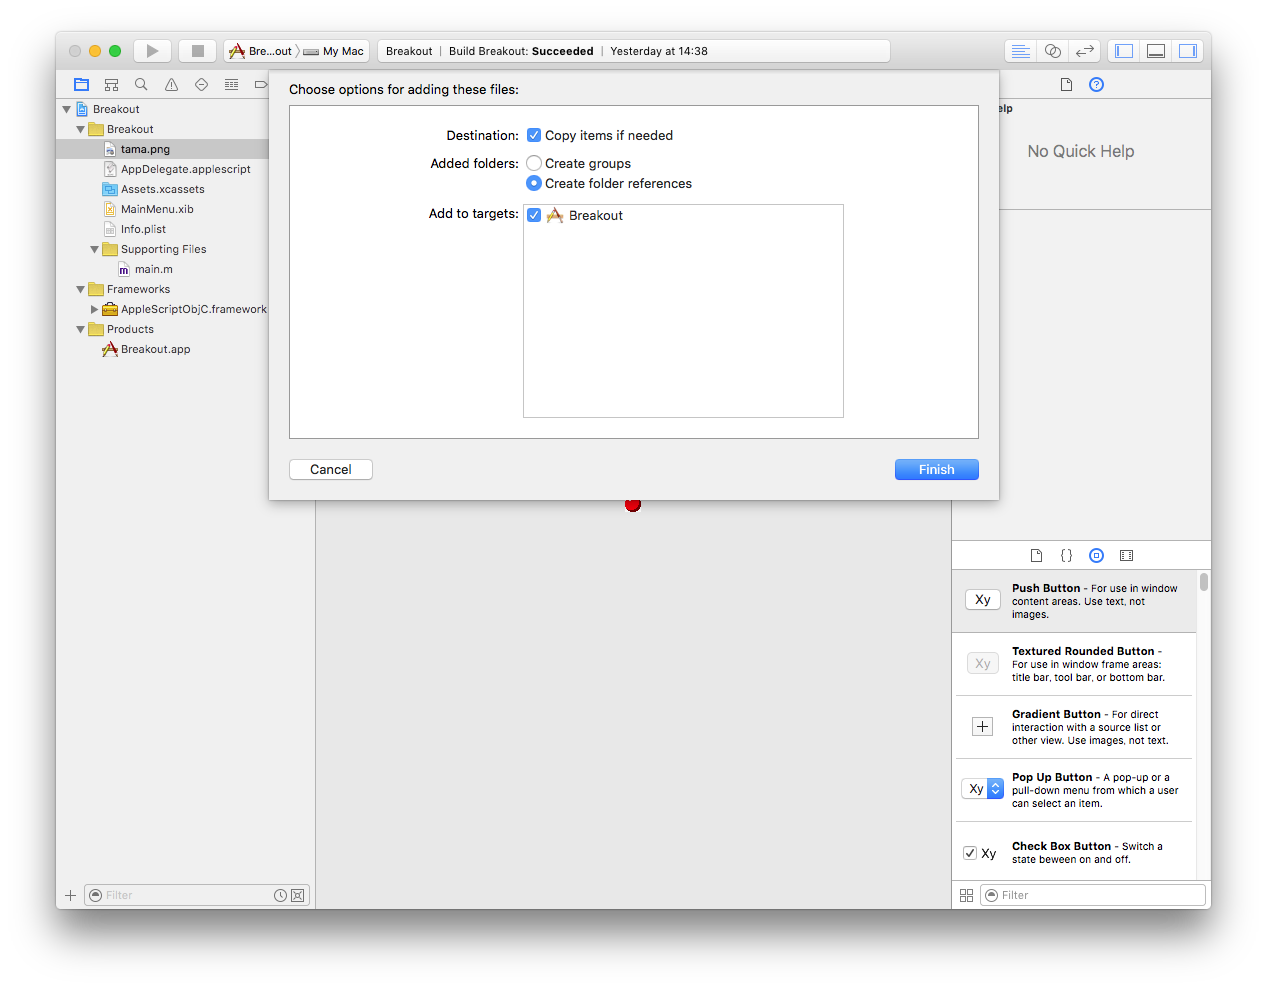
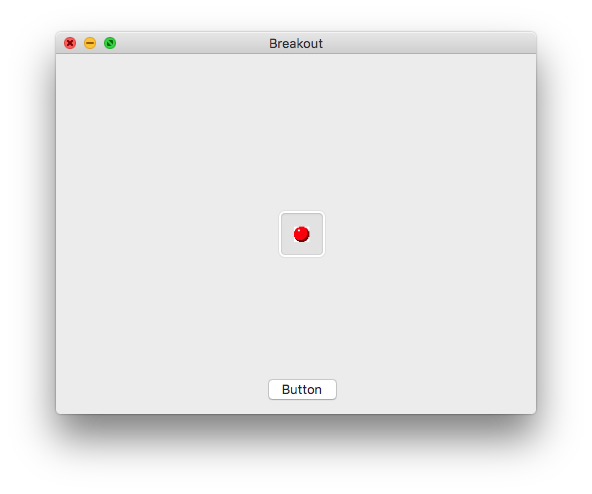
まずは前準備として、球の画像を用意します。
![]()
その球の画像を、Xcodeのプロジェクトに登録します。
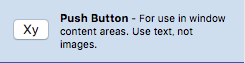
それから、XIBのウインドウビューの上に 画像を表示させる image WellとPush Button を設置します。
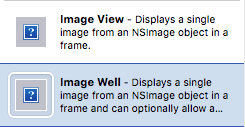
※今回はImage Wellを使いましたが、本当はImage View をつかいます。今回は、表示される枠を使って説明する部分がありまして使用しています。
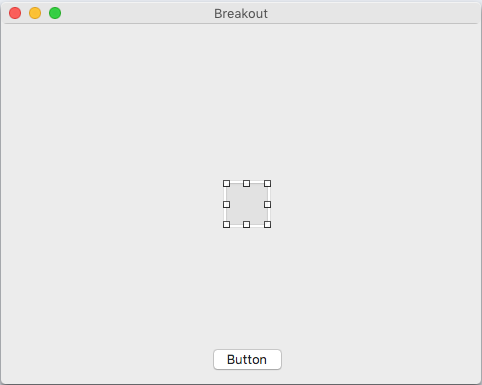
Image Well (Image View) には画像が登録されていませんので、先ほどプロジェクトに読み込んだ tama.png を登録しましょう。

イメージビューオブジェクトを選択して、右上のメニューAttributes inspecter を選び、
Image Viweグループ内のImage:に tama と入力。(tama.pngとしなくても、プロジェクト内に登録されたものは読み込むみたいですね)
これで画像が表示されます。
アプリケーション本体のDeregateと各オブジェクトを接続します。
AppDeregate.applescriptに下記のコードを入力します
property view1 : missing value
property image1 : missing value
on action1_(sender)
—-(* ここは後で入力します *)
end action1_
image1は Image Well と
action1_ はボタンと
そして、view1はNSViewオブジェクトと接続します。
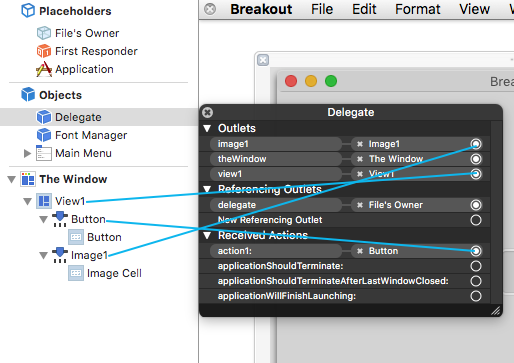
NSViewオブジェクトって? そんなの設置してないよ?と思うでしょうが、これはウインドウに最初から用意されているものです。
ウインドウ(NSWindow)に他のオブジェクトを設置したり表示したりするための地盤の役目をするものがNSViewです。
基本的なものなので、意識して用意しなくても最初からセットとして準備してくれています。今回は情報のコントロールするために接続します。
では、球を移動するためのコードを入力しましょう。
global viewX,viewY, tamaX,tamaY, moveX,moveY
on applicationWillFinishLaunching_(aNotification)
set {moveX,moveY} to {10,10}
end applicationWillFinishLaunching_
on action1_(sender)
set origin1 to view1's frame()'s |size|
set {viewX,viewY} to {origin1's width, origin1's height}
set origin2 to image1's frame()'s origin
set {tamaX,tamaY} to {origin2's x, origin2's y}
my moveBall()
end action1_
on moveBall()
set {tamaX,tamaY} to {tamaX + moveX, tamaY + moveY}
if (tamaX < 0) or (tamaX > (viewX - 0)) then set moveX to 0 - moveX
if (tamaY < 0) or (tamaY > (viewY - 0)) then set moveY to 0 - moveY
set BollPosition to {x:tamaX, y:tamaY}
image1's setFrameOrigin_(BollPosition)
end moveBall
最初はglobal命令でハンドラをまたいだ変数データのやり取りができるようにします。
次にapplicationWillFinishLaunching_という、ウインドウが開かれたら実行されるアクションハンドラを使って、球の移動量を設定しています
origin1にベースとなるview1のサイズを取得し、数値をviewX,viewYに入れています。
origin2に球のimage1の原点位置を取得し、数値をtamaX,tamaYに入れています。
その後、実際の移動をさせるためのコードをmoveBallハンドラで処理させる命令をだしています。
新しく作られたハンドラmoveBall内で、球の位置に移動量を加算しています。
次に球の位置がベースとなるview1からはみ出す位置になったら、反対に戻る移動するように移動量を変更しています。
最後に、球の新しい位置をImage Wellに送っています。
ここまでで、実行すると、ボタンをクリックするごとに球の画像が移動していきます。
でも、ゲームでの球の移動は、ユーザーがクリックされたら移動しなさい。というものではないですよね?
勝手に自動で動くものでなければいけないはずです。
移動するために繰り返しmoveBallハンドラが実行されなければいけないはずです。
では、action1ハンドラ内に繰り返すためのリピート文(repeat)を入れれば良いのでしょうか?
それは間違いです。たしかに repeat をつかえば移動はしますが、その中で繰り返してしまうため他の命令を受け付けなくなってしまいます。
ですから、繰り返すのではなく、『一定の時間毎に命令を実行させる』コードを使用します。
それは、NSTimerというクラスのコードになります。
○ NSTimerを使うための初期準備
property NSTimer : class "NSTimer"
○ 開始するためのコード
NSTimer's scheduledTimerWithTimeInterval_target_selector_userInfo_repeats_(|繰り返す間隔|, |対象となるスクリプト名|, "ハンドラ名", |ハンドラに最初だけ渡す値|, |繰り返し実行するかの許可|)
○ 終了するために使うコード
invalidate()
があります。
property NSTimer : class "NSTimer"
global TimerObj
global flg
on applicationWillFinishLaunching_(aNotification)
set {moveX,moveY} to {10,10}
set flg to false
end applicationWillFinishLaunching_
on action1_(sender)
if flg is false then
set origin1 to view1's frame()'s |size|
set {viewX,viewY} to {origin1's width, origin1's height}
set origin2 to image1's frame()'s origin
set {tamaX,tamaY} to {origin2's x, origin2's y}
--my moveBall()
my timerStart()
set flg to true
else
try
tell TimerObj to invalidate()
end try
set flg to false
end if
end action1_
on timerStart()
try
set TimerObj to NSTimer's scheduledTimerWithTimeInterval_target_selector_userInfo_repeats_(0.01, me, "mainLoop", missing value, true)
on error
set TimerObj to missing value
end try
end timerStart
on mainLoop()
my moveBall()
end mainLoop
NSTimerを実行するためのオブジェクトをTimerObjに収めてコントロールしています。
TimerStart()ハンドラで、タイマーオブジェクトを作って開始しています。
|対象となるスクリプト名|は、このスクリプト自身なので"me"にします。
タイマーが有効な間実行する部分の"ハンドラ名"は、"mainLoop"にして、ハンドラを別に作っています。
タイマーを停止するには、tell TimerObj to invalidate() で停止します。
タイマーをスタートする時、または停止する時に try を使っていますが、何かの不具合があった場合の予防策ですので、入力しておいたほうが無難だと思います。
(細かいところを説明するのめんどくさくなった。)
ここまでで、動くだけは動くと思います。
次回は、動き方の不具合について書いていきます。
ここまでのコード全体
(*ここから*)
script AppDelegate
property parent : class "NSObject"
property NSTimer : class "NSTimer"
global TimerObj
global flg
property view1 : missing value
property image1 : missing value
--property Button1 : missing value
global viewX,viewY, tamaX,tamaY, moveX,moveY
global flg
on action1_(sender)
if flg is false then
set origin1 to view1's frame()'s |size|
set {viewX,viewY} to {origin1's width, origin1's height}
set origin2 to image1's frame()'s origin
set {tamaX,tamaY} to {origin2's x, origin2's y}
--my moveBall()
my timerStart()
set flg to true
else
try
tell TimerObj to invalidate()
end try
set flg to false
end if
end action1_
on timerStart()
try
set TimerObj to NSTimer's scheduledTimerWithTimeInterval_target_selector_userInfo_repeats_(0.01, me, "mainLoop", missing value, true)
on error
set TimerObj to missing value
end try
end timerStart
on mainLoop()
my moveBall()
end mainLoop
on moveBall()
set {tamaX,tamaY} to {tamaX + moveX, tamaY + moveY}
if (tamaX < 0) or (tamaX > (viewX - 0)) then set moveX to 0 - moveX
if (tamaY < 0) or (tamaY > (viewY - 0)) then set moveY to 0 - moveY
set BollPosition to {x:tamaX, y:tamaY}
image1's setFrameOrigin_(BollPosition)
end moveBall
-- IBOutlets
property theWindow : missing value
on applicationWillFinishLaunching_(aNotification)
set {moveX,moveY} to {10,10}
set flg to false
end applicationWillFinishLaunching_
on applicationShouldTerminateAfterLastWindowClosed_(sender)
return true
end applicationShouldTerminateAfterLastWindowClosed_
on applicationShouldTerminate_(sender)
return current application's NSTerminateNow
end applicationShouldTerminate_
end script
(*ここまで*)
書籍販売
Applescriptの同人誌です。

『ApplescriptBasicMagazine Vol1』(販売中)
時計を作ることから理解するオブジェクトプログラミング編です。

 『ApplescriptBasicMagazine Vol2』
フォトショップの操作を自動化してみよう!編です。
販売サイト

『ApplescriptBasicMagazine Vol1』(販売中)
時計を作ることから理解するオブジェクトプログラミング編です。
『ApplescriptBasicMagazine Vol2』フォトショップの操作を自動化してみよう!編です。
販売サイト


コメント 0